A Thornback
Original design by Ian Newham: http://www.ian.ourshack.org/kitemaking/plans/thornback.html
Panel layout modified by H-P Raue circa Aug 2006.
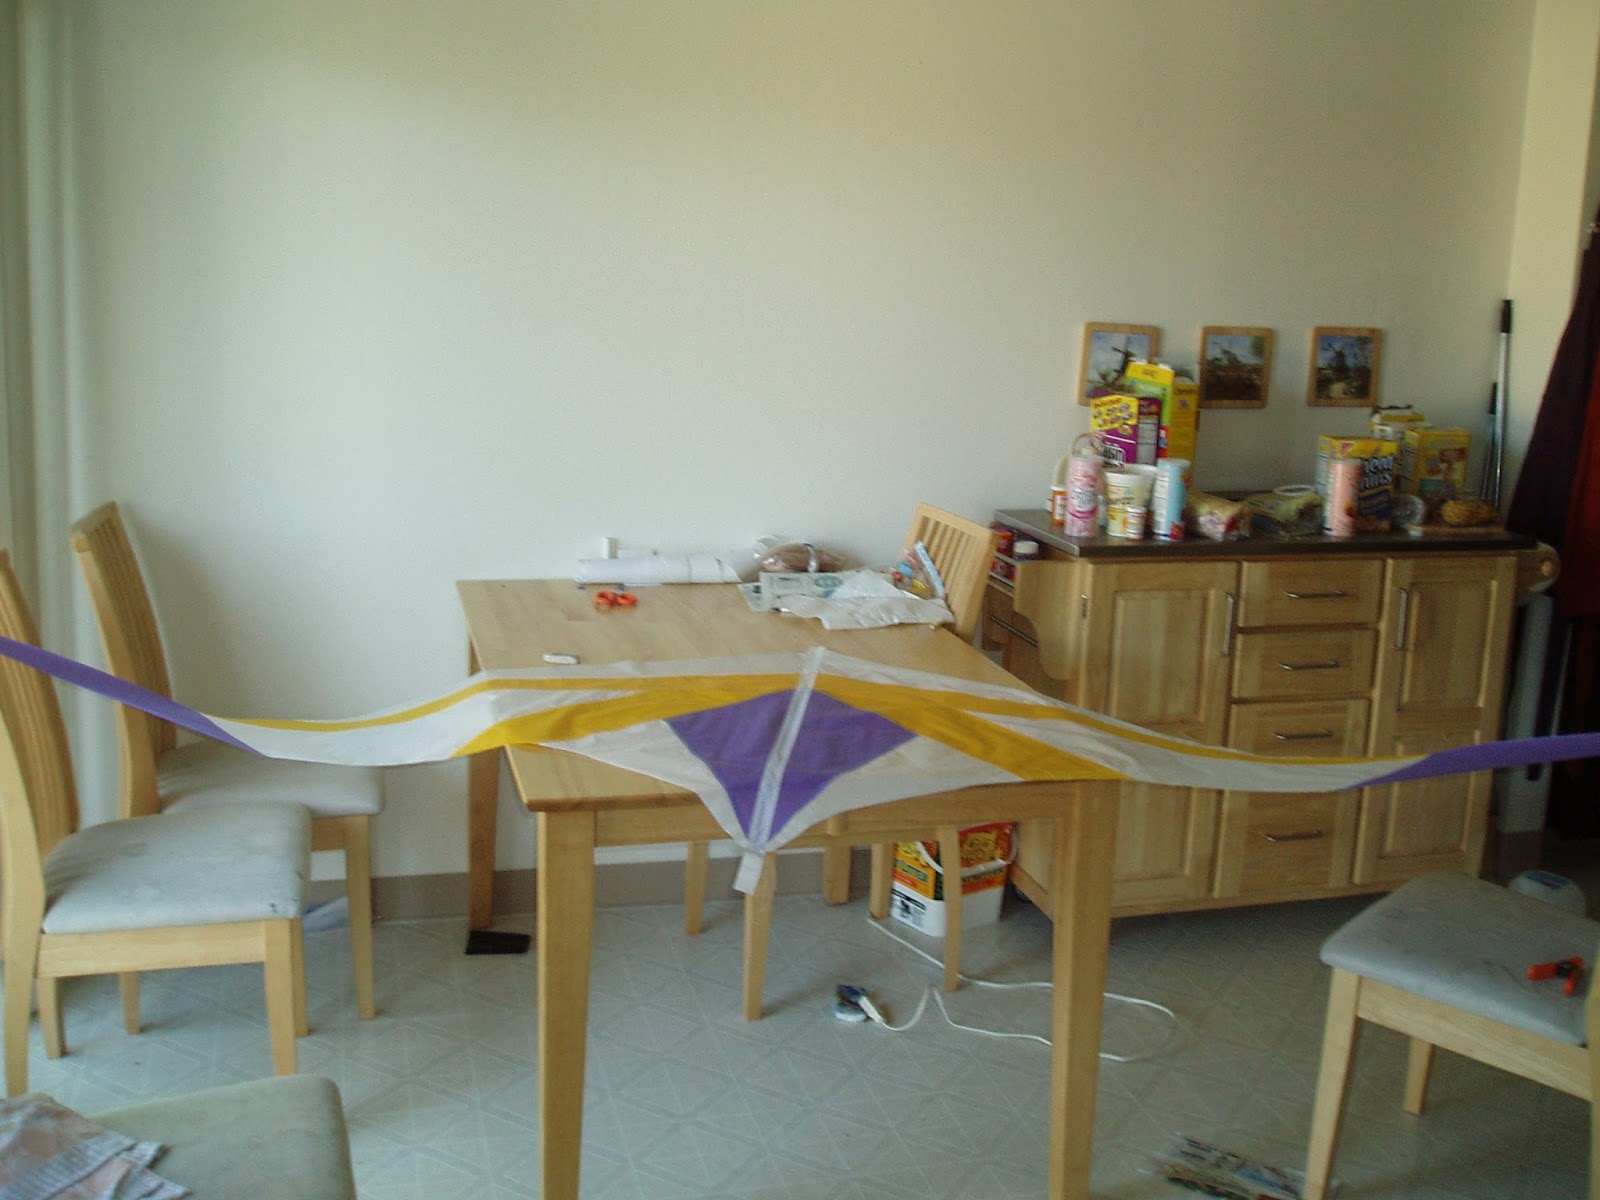
The pictures in the build are for this purple/yellow/white number.


The pictures in the build are for this purple/yellow/white number.
The panel layout shown is for this version though
So here we go:
BUT FIRST a WARNING: building one of these will cost you approximately 50-60 hr (that's what it takes me just about) and cost around $150 in materials. If you take a quick look here https://www.thekiteshoppe.com/ you can see that you can buy a whole lot of kite for that money these days . . . SO . . . as most of the time; buying something "close enough" is cheaper (and easier) than building it yourself. Why did I bother . . . well I wanted to know: a. if I could do it; b. why these pieces of sticks and cloth were so darn expensive; and c. for fun.
So if that hasn't put you off on with the show . . . . .
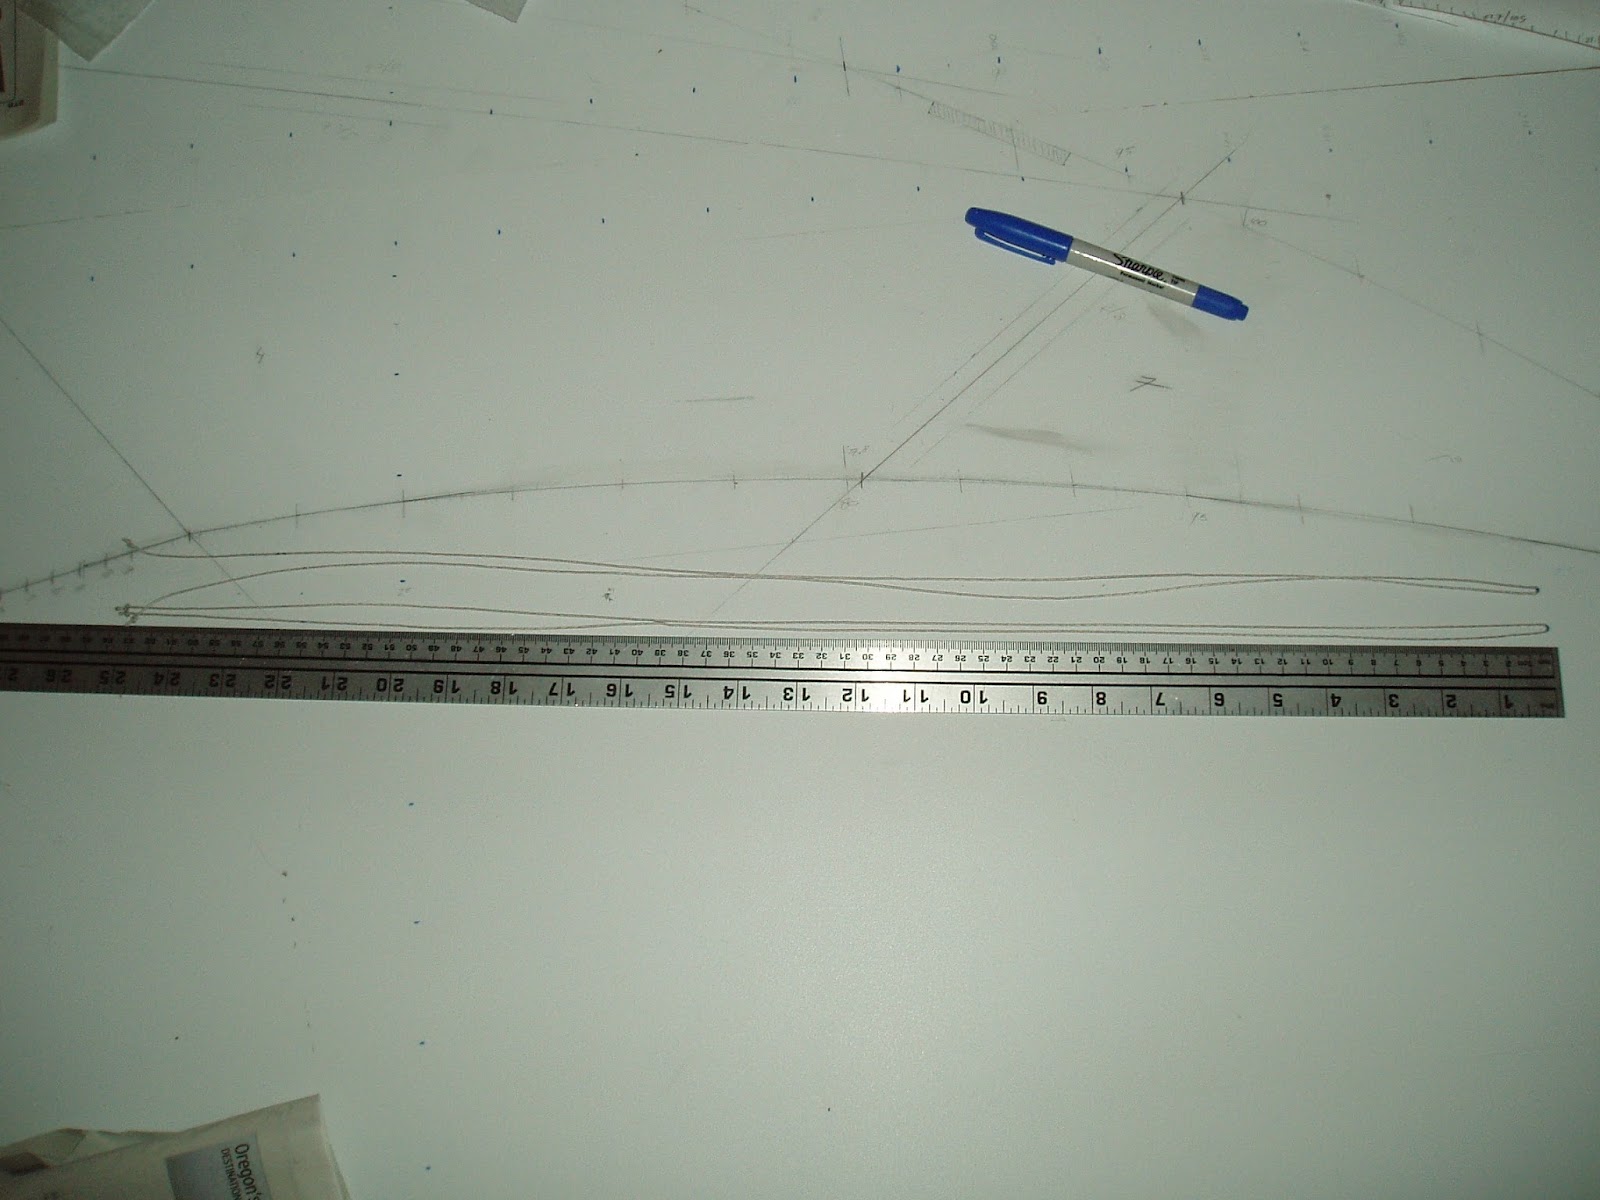
- step 1 convert the plans to the real world & materials:
 |
| straight edge, scissors, square and a WHOLE lot of measuring |
 |
| OR just print it, the spine is 900 mm long leave me a note if you want the real size pdf file |
Talking about material mine came from here I believe: http://www.kitebuilder.com/ but it looks like they are closed now. A quick google search turned up this http://www.funwithwind.com/store but they are about twice as expensive (~ 10/yrd) as I remember the other place. These seem a bit more reasonable: http://www.catchthewind.com/fabric.html and they also have the material for the frame Amazon also has some but it's also around $10/yrd so maybe that's just what it is these days.
To make the kite you will need:
>> fabric:
well not strictly fabric but you'll need it: seam tape
coated ripstop nylon 0.75 oz/yrd . . . aka spinaker sail cloth . . . various pieces
4" wide dracon? I believe (leading edge & various reinforcements such as standoff points)
2" wide dracon for the center seam
2" wide 1.5 oz/yrd ripstop nylon tape for the trailing edge binding . . . can be used for the center seam as well
optional: seat belt material for the nose (but you can also use multiple layers of the 4" material)
>> frame, there are other options (one of which is the original on Ian's site), this is mine:
4 x Skyshark 200 (leading edges)
2 x Skyshark 200 (lower spreaders)
2 x Skyshark 200 (spine)
1 x 6 mm carbonfiber upper spreader
4 x 20 cm x 2.5 mm carbon fiber standoff connectors
You also need
4 x leading edge connector (6 mm)
4 x 6 mm carbon fiber dowel (to connect the leading edges, spine through the T & lower spreader)
3 x 6 mm carbon fiber dowel (to connect the nocks at the tail & wingtips)
1 x center T (6 mm holes)
4 x standoff connector (spreader end)
4 x standoff connector (sail end)
optional 4 x standoff connector caps (I don't bother with these as I just loose them)
3 x nocks for the wing tips & tail
4 x 6 mm frame clips (to hold the leading edge connectors in place)
All of this should be available from any reasonably good kite store ... my preference (but then I live only about an hour away) is https://www.thekiteshoppe.com/ and if you can't find it closer they will ship I believe.
>> line:
for the bridle . . . either bridle line, OR 150 lb test kite line
150 lb kite line (leach line)
nylon thread for the seams . . . get the good stuff you do NOT want it to break
>> tools:
hot cutter
sewing machine
good scissors (small and large)
small hacksaw
superglue
OK so on with the show . . . .
- STEP 2 about seams
There are several ways to construct a seam for a kite, the easiest is a plain seam in which the pieces are just overlaid and sewn together. Easy, peacy, quick and fast . . . so why do it any other way . . . weeeeellllllll this leaves the edges of the material exposed; not a huge deal but you do need to make sure they do flutter around loose so you need to sew just outside the seam on one edge of the zigzag . . . . Oh did I mention all seams are sewn with a 3 stitch zig zag . . . . the other option is to use what is called a french seam, here both pieces are folded into each other and and there are no exposed edges, that is what I did here . . . it's harder but it looks better - I think so anyway.For a plain overlaid seam you need a 6 mm seam allowance on ONE side (or 3 mm on both sides) the width of the seam tape (check that your seam tape is 6 mm). For the french style seams you need . . . . oofffffff I've got to work that out again . . . . uhm . . . . that's the width of the seam tape on BOTH sides? . . . . . Nope it's 1.5 times the width on both sides . . . . . .
|-----------------------------
| ============|
|------------ |
====================|
Yep half-assed ASCI graphics
So once you've decided HOW to build this you know how much seam allowance to add to the panels BEFORE cutting them out . . . or you will have the measure this and add it BEFORE cutting the fabric or ALL you dimensions will be off . . . you can still build the kite but it will be slightly smaller AND you may have to do some adjusting.
And AS ALWAYS measure twice or three or four times, cut once . . . . I'm only responsible for my own stupidity .... andy one else's is their own business.
A final note on seams . . . leave a GENEROUS amount of material for the center seam . . . 2" is good
- STEP 3 cutting material
Well here we go:Double the material, remember DOUBLE THE MATERIAL, you need 2 identical parts of each; Overlay pattern; tape down; cut along straight edge (freehand does NOT cut it here) . . . a couple of spring clamps to hold the straight edge down really helps.


- STEP 4 more seams . . . . and sewing
So you think you'd like to sew I kite, well let me tell you my friend . . . . .
 This is how it starts
and this is how it ends
and in between well that's between you, your tools and the fabric
Please note that you can NOT sew the pieces together in ANY order when using 'french' seams, look closely at the plans ... the 2 sections in the tail go together (purple and white), the leading edge sections go together (white & yellow), the mid section can be put together (yellow & white) or the yellow can be sewn to the tail section followed by the white to the yellow, the leading edge is sewn to that and the tip comes last. If you do plain overlaid seams you have a little more flexibility but this order still works out pretty well.
NOTE: ALL the thread at the seam ends in the sail is fixed with a drop of superglue . . . MOST of them are additionally folded over and fixed with seam tape when they end in another seam . . . no sewing back and forth to fix the threads ANYWHERE.
 |
| Separate the pieces that were cut together and put one set aside. Put seam tape along the edge to be sewn, this should be EXACTLY on the edge, the tape should be right on the edge of the fabric - this piece is RIGHT SIDE UP - if you were to do a straight overlaid seam you'd just stick the next piece right exactly on the seam tape - RIGHT SIDE UP - and sew things together .... but we're doing it the hard way so follow along. |
 |
| Put the second piece UPSIDE DOWN right (and I mean right, no gaps) next to the seam tape and make sure it lines up(That's what the pencil line is for - when the yellow piece folded back over the edge on the right should be continuous without any 'bumps') . . . check . . . recheck and ........ well you get my drift .......... Yes it 'looks' wrong at this point but believe me it WILL line up right. |
 |
| Once in place score the fold with a fingernail to set it, remove the paper from the seam tape and tape the bottom piece to the top . . . alternatively the seam tape could have started on the back side of the top piece . . . . it works either way. |
 |
| Add another layer of seam tape on top this just fixes things in place for sewing . . . if you're comfortable you can omit this . . . your sewing machine will thank you for it . . ., fold back the top piece . . . and check that that edge is continuous . . . you can still tear it apart (gently and after saying some unrepeatable terms ... I have) at this point and start over . . . but after the next step it's MUCH harder. |
 |
| and sew things together with a 5mm 3 stitch zig zag . . . the seam is 6 mm or so so stay nice and in the middle ... try this on a couple of scrap pieces first because due to the thickness of the seam and the slipperyness of the material not to mention the two layers of seam tape you probably need to adjust the tension of the thread on your sewing machine to get a nice stich. |
Okay now repeat another .... 13 times to assemble 2 sail halves . . . .
Now comes the real check on your work ... these to halves should be IDENTICAL . . . .

And here they are overlayed . . . . not prefect but close enough the ALL important seam at this point is the CENTER SEAM so make sure the seams on the halves are as close together as possible and tape them together at the top and bottom of the center seam
. . . . here's why there was that extra 2" . . . .
NOW lay them on you cutting table and cut 1" OUTSIDE the center seam . . . that is towards the long open end of the wings NOT towards the wing tips . . . measure as many times as you want but make sure . . . . . you NEED to get this right . . . . well or almost so some adjust ment is still possible at the next step but if you're off by TOO much (more than 1.5" say) it's over.
Now put seam tape on both edges of a piece of 2" wide dracon (or ripstop tape) that is about 4" longer than the spine at the bottom and tape if EXACTLY to the center side of the BACK of the wing so the wing overlays ALL of the dracon (the nose is at the top here), next put a piece of seam tap over the center and tape the other wing exactly along the other side of the dracon and finally tape another piece of 2" dracon about 1" longer than the spine exactly over the first, loosen/unstick the bottom of the first piece at the tail, fold the top piece over the tail & stick . . . everything should be lined up EXACTLY at this stage or your kite will have bias to turn to one side and will turn even when the lines are even.
 OK . . . now sew another piece of dracon over the loose end at the tail . . . and some kevlar tape would be good here too . . . sew a piece of velcro on the end & sew a LONG piece of velcro of the opposing 'polarity' down the spine on the other side . . . . here is a preview of the final product from the back side:
See if you can spot my mistake in the 2nd photo . . . I only noticed at this point and . . . oh well
OK . . . now sew another piece of dracon over the loose end at the tail . . . and some kevlar tape would be good here too . . . sew a piece of velcro on the end & sew a LONG piece of velcro of the opposing 'polarity' down the spine on the other side . . . . here is a preview of the final product from the back side:See if you can spot my mistake in the 2nd photo . . . I only noticed at this point and . . . oh well


So NOW we have a sail we need to attach to a frame . . . . .
- Step 5 off the edge(s)
So there are 4 edges that need to be bound and the procedure for all 4 is pretty much the same. The trailing (bottom edges) are bound with 2" 1.5 oz. ripstop tape . . . The leading edges need 4" dracon (they will have to take more abuse) to accommodate the leading edge spars. The strailing edges are 'harder because they are more curved . . . go slow and you'll be just fine.
So here goes:
So now we have a kite sail . . . . . . frame next . . . . . .
Except that we need a place to put the standoffs . . . . . DARN . . . . . I though we were done

 Tie a loop in the wingtip ends of the leach lines and slip them over the nocks . . . you did insert those wingtip knocks . . . the tighten the leading edges using those lines threaded through the wingtip holes, loop the one end, over the knock, pull tight, loop around the nock, slip the line under the loop pull tight & repeat twice more . . . easy to undo and strong enough ... ... ... the photo uses a slightly different attachment to the leading edge . . . . the red is a little loop sewn along with the leading edge of the kite and the line is treated through that.
 I go with the standard three point bridle, it connects with little pigtails between the spreaders and clips on the leading edges. The pigtails just go on with prusik (aka larks head knots) . . . what . . . oh google it . . .

 And a somewhat lager pigtail around the center T.
 Measure off the lengths of the bridle, tie 1" loops in one end, mark the line at the length desired with sharpie, and use GOOD knots like a bowline, a simple 'knot' is guaranteed to slip, especially if you are using 150 lb kite line (spectra) for the bridle.
 Use some contrasting line . . . this is only a short length so it doesn't EXACTLY matter what it is . . . to make the tie ins for the flying lines. Tie a LARGE knot in both ends so the lines can be put on with a simple larks head (aka prusik knot). Tie all three bridle lines to one end . . . . and tie the other ends using the GOOD knots on the marks to the pigtails.
 |
| Put seam tape along one edge and score the ripstop tape in the middle to set a seam |
 |
| And just tuck the sail in so it's in the seam, I hold it together at this phase using hair clips. Folding over then ends for some reinforcement is also a good idea. You can see here that I left the spine unfinished at this point. |
 |
| Once you've got it set to your satisfaction, just start removing the seam tape and sticking things together. |
 |
| Next put some seam tape along the other edge of the ripstop tape and repeat. |
 |
| And sew it all together . . . once again a zig zag. |
 |
| Oh and one FINAL thing for the trailing edge . . . the leachline . . . here a piece of what I believe is 150 lb test kite line, a hair clip worked well to push it through the trailing edge tunnel. You CAN do this before sewing but be SURE not to sew the line . . . it's pretty hard to sew into the line if you're careful but Murphy IS watching over your shoulder. |
The (b)leading edge
So here is how I made the leading edge end at the wingtip, you can just leave it square . . . or do a cutaway but this is: i. a place where lines catch & ii. subject to a bit of abuse when doing tip landings or leading edge drags - - - so neatness (to prevent unintentional catches) and some reinforcement (to deal with the abuse) counts. |
| Cut out |
 |
| fold over and in . . . . . & seamtape together . . . . . lovely stuff that seam tape. |
 |
| clamp in place for fit check .... approved . .. ... .... ... .. . the line is the leachline . . . make SURE you do NOT sew that when sewing on the leading edge . . . in fact stop sewing when you hit the trailing edge binding. Other than that it's pretty much the same as putting on trailing edge. Make SURE the sail is tucked in ALL THE WAY into the edge. |
- Step 7 on the nose
The nose of a kite is the place that faces the most abuse - especially when you're a beginner - so some reinforcement is in order which is why quite a few are made of seatbelt material . . . if you have a cheap sewing machine be careful because 2 layers of seatbelt material is A LOT for most machines. Not being an ABSOLUTE novice I went with 4" dracon for the nose but be aware that the single layer I used is NOT optimal . . . 2 or even 3 overlapping progressively larger layers (so you don't have to sew through all of them all the time is probably better.So here goes:
 |
| Tape on . . . . . |
 |
| Draw sewing lines . . . and sew .. .. .. DO NOT sew the bottom of the center pocket closed, that opening is needed for the spine. Lets repeat that: DO NOT sew the bottom of the center pocket closed - zig zags for the lines in the center, the outside edges along the leading edge get CAREFULLY cut with the hot knife so they are fused together . . . if I was doing this again I think I'd use some epoxy, silicone glue or gorilla glue to hold it all together (instead of the seam tape) . . . Lowes has some pipe repair tape that hardens to "metal like something" that also might be worth an experiment . . . if it doesn't turn out to be to heavy .. .. .. .. nose - light, tail heavy (within reason) |
Except that we need a place to put the standoffs . . . . . DARN . . . . . I though we were done
 |
| Test fit for the reinforcement . . . once again I was a bit lazy and only used a single layer, later builds have 2. |
 |
| Holes for standoffs punched (the standard are the holes, one in from the edge), note that these only go through ONE side of the reinforcement, you CAN punch them all the way through the sail (the standoff ends will keep them in place). If you do that make SURE you don't cut the leachline . . . . . The location for the holes are on the plans. |
- Step 8 framing the question . . .
So this is were we want to go
So how do we get there
Oh DARN we forgot the cutouts in the leading edge for the upper and lower spreaders . . . so get out the hot knife and measure . . . once . . . twice . . . three times and cut the cuttouts . . .
 |
| And here they are . . . well at least one of the lower leading edge cutouts . . . if you're more than a novice flyer you might want "covered cutouts" (and also yo-yo stoppers) but those are a bit harder once you've already sewn everything together - not impossible, just harder - and require more measuring - what else - if made before hand. |
Strangely enough I seem to have millions - well a good selection anyway - of photographs showing the building of the bridle for the kite but almost none of the framing . . . wonder if I never made them or if they . . . wait a minute . . . uh, nope . . . so here goes step by step . . . . BTW all glue connections are with superglue . . . so make sure you do it right the first time.
1. Take the skyshark 200 for the upper leading edges and glue the 6 mm dowel into what will be the bottom end . . . half the dowel into the tube, half the dowel sticking out . . . what else.
2. Take the right (or left) piece of skyshark that will become part of the lower spreader, measure the width of the center T, glue in a dowel into the tube leaving half the length of the dowel + half the width of the center T sticking out.
3. Glue dowels in all 3 nocks.
4. Push the upper leading edged into the leading edge tunnel to the upper cutout put a leading edge connector over - it's going to be a tight fit, a bit of soap will help - and push them all the way into the nose making sure you're there at the end.
5. Push in the lower leading edges and seat them over the dowels in the upper leading edges . . . mark were they exit the leading edge tunnel . . . compare marks . . . they should be within an 1/8 of an inch or so . . . reseat them . . . check that the marks still line up . . . interchange them . . . check that the marks still line up . . . cut them at the mark + 1/4 inch down . . . once again I'm only responsible for my own stupidity, any one else's is their own business.
6. ..... ..... ..... OH DARN I don't have a center T hole yet . . . okay get out the hot knife . . . . cut out a center T reinforcement from the 2" dracon (or use the 4" if you want) see the photo above for idea . . . draw a 2" long 3/4" wide (make sure the head of the center T fits through) cutout, cover the back with seam tape & stick in place . . . . AFTER measuring 4 times where it should go of course. disassemble the upper leading edge, sew reinforcement in place - zig zags around the outer edges, straight stitch 1.8" or so in from the intended cutout . . . . your hot knife should be warm now so make the cutout through all the layers on the spine . . . on second thought move it outside first . . . you'll thank me afterwards .... .... .... so now we can get on with it . . . put the top of the spine into the nose at the back of the kite . . . make sure it's seated and mark the center T position ... check ... recheck . . . and cut 1/2 the width of the center T above the mark.
7. Glue dowel into the end of the tube you just cut . . . if you want to be precise 1/2 the dowel + 1/2 the width of the center T should be sticking out, but just 1/2 is OK here.
8. Burn a small hole in the leading edge right were the trailing edge ends (i.e. about 1" from the tip) and thread through about 10" of 150 lb kite line (or bridle line). Reassemble the upper leading edges - see 4. - . . . stick in the lower leading edges - see 5. - to the cutouts and push the lower leading edge connectors - the same as the upper leading edge connector - over and seat them on the dowels.
9. Put the center T over the dowel glued in the upper spine in find the one but last skyshark tube and use that for the lower spine. cut off 1/2 beyond the end of the spine . . . . you can - but I don't - glue the spine together now . . . . add one of the dowels with nocks & close the tail of the kite . . . .
|
| The yellow is some plastic tape over which that long metal piece (weighing 16 g) is treaded to give the tail a bit more weight for rotation tricks. |
Aside from the nose this is the point that gets the most abuse . . . thus the kevlar reinforcement.
10. Find the final unused skyshark tube and the one doctored with a dowel, thread the dowel through the center T and check against the leading edge connectors . . . slide the leading edge connectors up (or down) if needed so the spine and lower spreader are square, they are now be in the center of the cutouts right . . . the distance should be just about 37.5 cm from the center T to the leading edge . . . . cut the spreaders to the right length and install. Glue 2 6 mm clips below the spreaders . . . careful with the superglue you want to be able to rotate the connectors afterwards & you don't want to break them.
11. Slide the upper leading edge connectors to the center of the cutouts . . . you did measure their location at least 4 times right . . . check the length of the upper spreader against the assembled frame (should be 51.5 cm) and cut to length . . . if it's off by a cm or so don't worry, length against the frame is more important than length agains the plan . . . if it's off more than that find out what's wrong . . . glue 2 clips below the spreaders . . . careful with the superglue you want to be able to rotate the connectors afterwards. Oh and stick a piece of self stick velcro . . . the fuzzies . . . on the spine where the upper spreader crosses it to prevent it from rubbing through.
12. That leaves the standoffs . . . disassemble the lower spreader and slide on 2 standoff connectors on each part and reassemble. Glue the standoffs into the sail end connectors & push them into the holes (one hole in) in the reinforcements . . . . see above & below . . . . line up the connectors on the spreaders so the standoffs are at right angles to the spreader . . . the distance should be 25 cm . . . . if it's off by a little don't worry . . . cut them so they reach the lower edge of the spreader , they shouldn't bend when in place, but you should definitively need to bend them to get them into the spreader connectors.
And we have ourselves a frame . . . . . one more step . . .
Tie a loop in the wingtip ends of the leach lines and slip them over the nocks . . . you did insert those wingtip knocks . . . the tighten the leading edges using those lines threaded through the wingtip holes, loop the one end, over the knock, pull tight, loop around the nock, slip the line under the loop pull tight & repeat twice more . . . easy to undo and strong enough ... ... ... the photo uses a slightly different attachment to the leading edge . . . . the red is a little loop sewn along with the leading edge of the kite and the line is treated through that.
OK that was two more steps . . . . the other end of the leachlines goes through the nock at the tail, are tightened to the same piece of line and then tensioned to the center T . . . . or yo can tighten them directly on the nock . . . .
- Step 9 if pigs are bridled right the DO fly
So for the bridle see this page: http://www.ian.ourshack.org/kitemaking/plans/thornback.html the bridle is just about 3/5 of the way down the page . . . the measurements are in mm . . . . SO . . . . is that a problem? OK 25.4 mm = 1" there you go, you've got a calculator . . . in fact you're probably reading this on one SUPER calculator.
I go with the standard three point bridle, it connects with little pigtails between the spreaders and clips on the leading edges. The pigtails just go on with prusik (aka larks head knots) . . . what . . . oh google it . . .  And a somewhat lager pigtail around the center T.Measure off the lengths of the bridle, tie 1" loops in one end, mark the line at the length desired with sharpie, and use GOOD knots like a bowline, a simple 'knot' is guaranteed to slip, especially if you are using 150 lb kite line (spectra) for the bridle.Use some contrasting line . . . this is only a short length so it doesn't EXACTLY matter what it is . . . to make the tie ins for the flying lines. Tie a LARGE knot in both ends so the lines can be put on with a simple larks head (aka prusik knot). Tie all three bridle lines to one end . . . . and tie the other ends using the GOOD knots on the marks to the pigtails.
Hang the kite from both tie in points and it should hang straight with all the lines in tension.
And we have a kite, find some 100" 90# .... yes yes I know .... 30 m 45 Kg .... test kite line . . . . and a beach and go fly it.
If not . . . check that all the bridle lines are the right lengths . . . most likely one of the knots slipped when you were tying it (if they did, tie better knots next time) . . . if that's all correct . . . check that all the dimensions in the frame are symmetrical . . . you didn't cut one of the spreaders a different length than the other did you . . . maybe one of the clips of the leading edge has come loose and the connector slipped . . . check that all the standoffs are square to the spreader . . . . if all else fails, disassemble the spreaders and check the length of all the seams and compare left to right . . . . . if they are identical - and they should be, see the check towards the end of step 4. it's somewhere in the frame . . . this is why that check ... and cutting of the center was so important . . . . . .
No comments:
Post a Comment