
Thursday, May 23, 2019
Gimme some ... ... ... tone
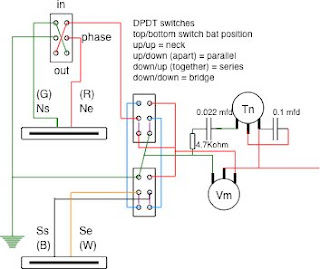
Ok here is the first go at the circuit . . . I'm not sure I'm 'sold' on the greasebucket I have on the tone pot but I want to try it ...
Monday, May 20, 2019
FINISHED ... again?? ... ... ... well kinda
Ok, so it LOOKS finished . . . but it's not 'wired up' yet.
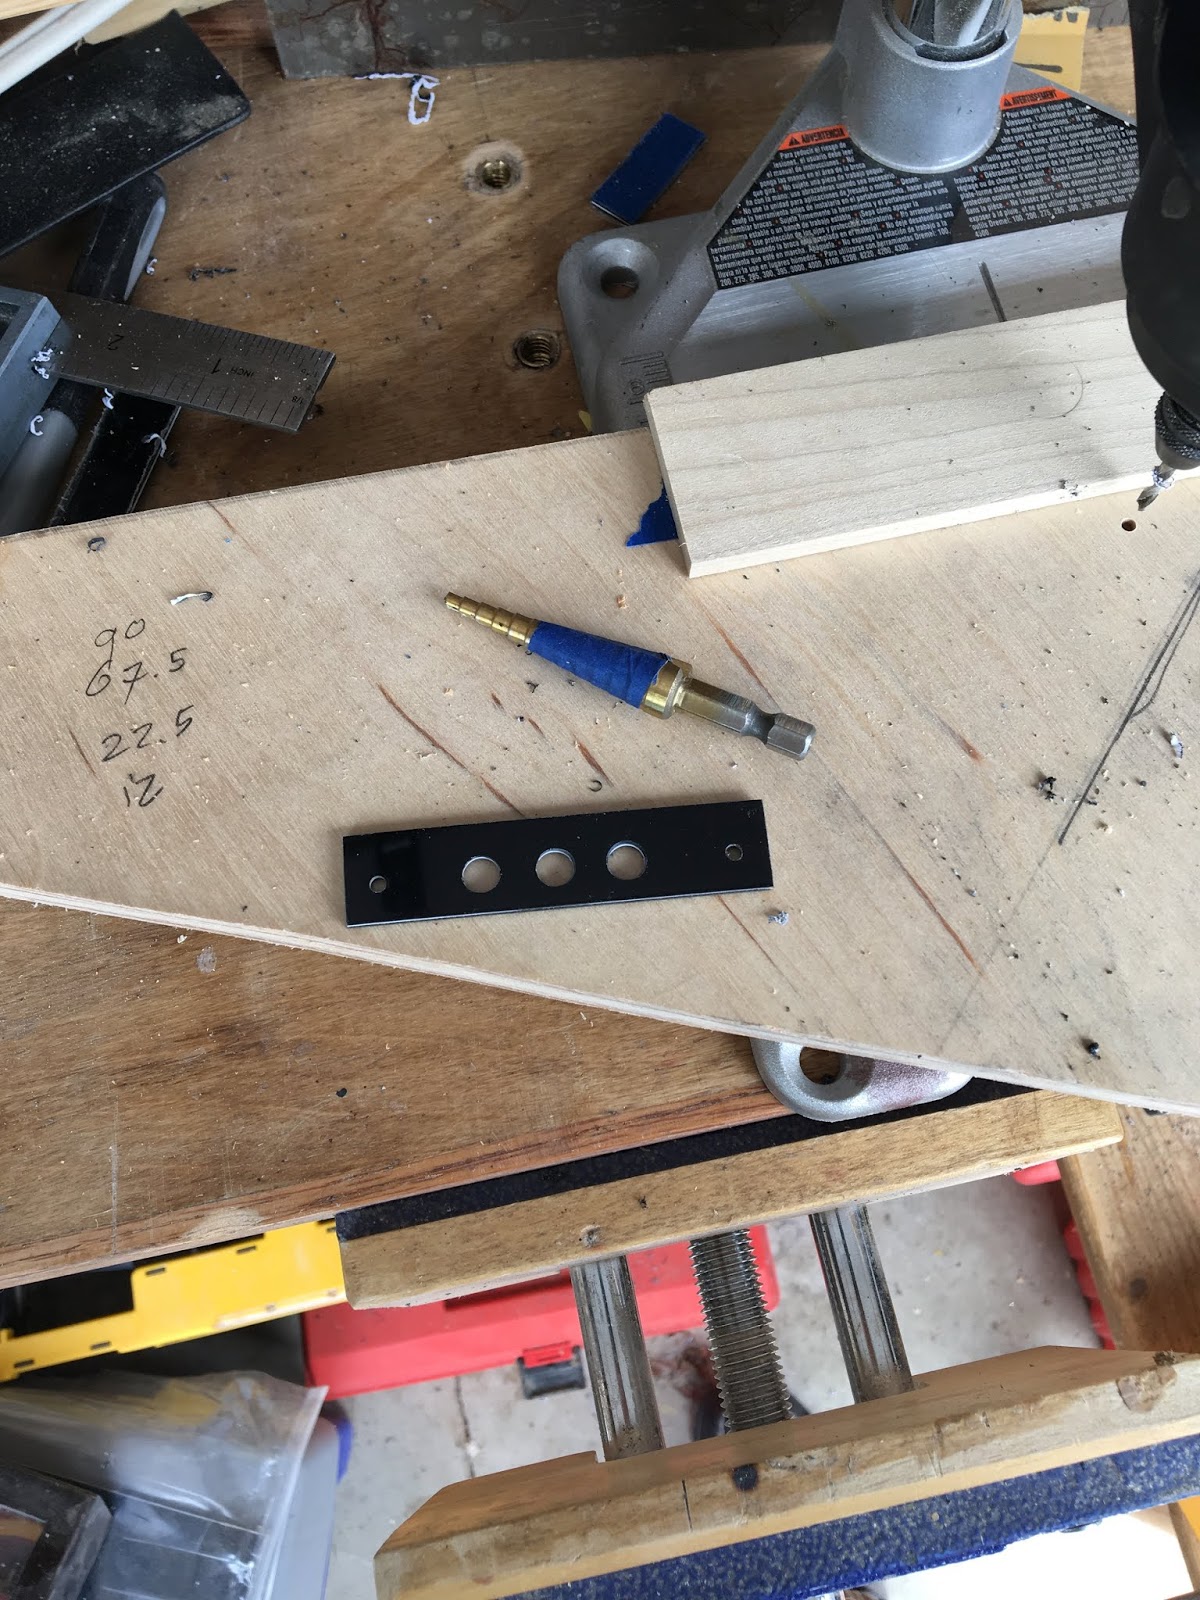
First the pickup controls need a place . . . cutting a blank to size, the finished blank (it's going to be just a rectangular slab for now, nice and easy) and enlarging the 1/8" pilot holes to 1/4" to fit the switches. I did this by hand as the plastic cut easily with the step bit.


And the finished product and a mockup with the switches installed


And then
 Reinstalling the bridge . . . and I just learned that Schaller 475 bridges come with 2 DIFFERENT intonation screw and spring lengths . . . did NOT know that before, and did not pay attention so were do they go . . . in the end I put the longies on E, A, G and the shorties on e, B, D.


The final version will have brass pickup rings - and possibly the witch 'holder', which may also revert to a 5 way super switch -, although I don't know yet if they will be polished up of brushed. But I want this in a playable condition as soon as possible as I have to build a shed.
First the pickup controls need a place . . . cutting a blank to size, the finished blank (it's going to be just a rectangular slab for now, nice and easy) and enlarging the 1/8" pilot holes to 1/4" to fit the switches. I did this by hand as the plastic cut easily with the step bit.


And the finished product and a mockup with the switches installed

Next up ... measuring the screw holes for the pickup rings, and installing the ground for the bridge.


And then

And here it is installed . . . with some of the details hat all the cutouts were for, the switches are a variation of the coils switching system for the pRails on my JM no applied to 2 different pickups, when wired up they will do Neck - both forward, Bridge - both back, Series - together, Parallel - apart. The little nubbin in the middle is a phase switch. The posts of the volume and tone knobs will be cut flush with the 'roller' knob and blackened with some black nail polish . . . and then I still need a plate for the back of the cavity . . .


The final version will have brass pickup rings - and possibly the witch 'holder', which may also revert to a 5 way super switch -, although I don't know yet if they will be polished up of brushed. But I want this in a playable condition as soon as possible as I have to build a shed.
Friday, May 3, 2019
Running rings
So ...
this is were I left it . . . . it needs some contours as a rectangle is pretty boring.


And the final product, minus the holes for the mounting screws.


this is were I left it . . . . it needs some contours as a rectangle is pretty boring.

Note that this will not necessarily be the design I use for the brass but once again I want to try the same techniques I would use to shape the brass. The rectangular cuts were roughed in with a hacksaw and then refined with a file. The oval and round patterns on the other corners were directly filed in but with the brass I would again first rough them out to cut down on the time spent filing.


And the final product, minus the holes for the mounting screws.

Starting to think about the wiring as that's the next step . . . it sure looks like there may be a guitar circuit in there . . .

Subscribe to:
Posts (Atom)