Monday, October 31, 2016

Hard work . . . .

So here is my hard work this weekend, in the corner is my jig for cutting baseboards serving as a 'weight to hold the board to the side while it's being glued . . . the other bits and pieces serve the same purpose as the wall ISN'T straight . . .  and here is the UGLY concrete covered with 'fake' wood with the baseboard installed. And YES, I did finish both sides of the room, it now just needs a screen along the top to cover the gap there . . . 


Oh, you aren't here to admire my work in rehabbing our converted garage . . . uhmm . . . sorry . . . . 

So this is where things ended this weekend . . . and here is how we got there . . . 


I don't what to ruin my nice laminated piece so I went on with the plywood to see what problems I could run into when making the REAL thing . . . 
So first the dremel got a workout finishing up the edge of the THING


Nice job . . . the bridge end will be done later after I verify the location of the posts . . . don't want to do it twice and don't want to take off to much.
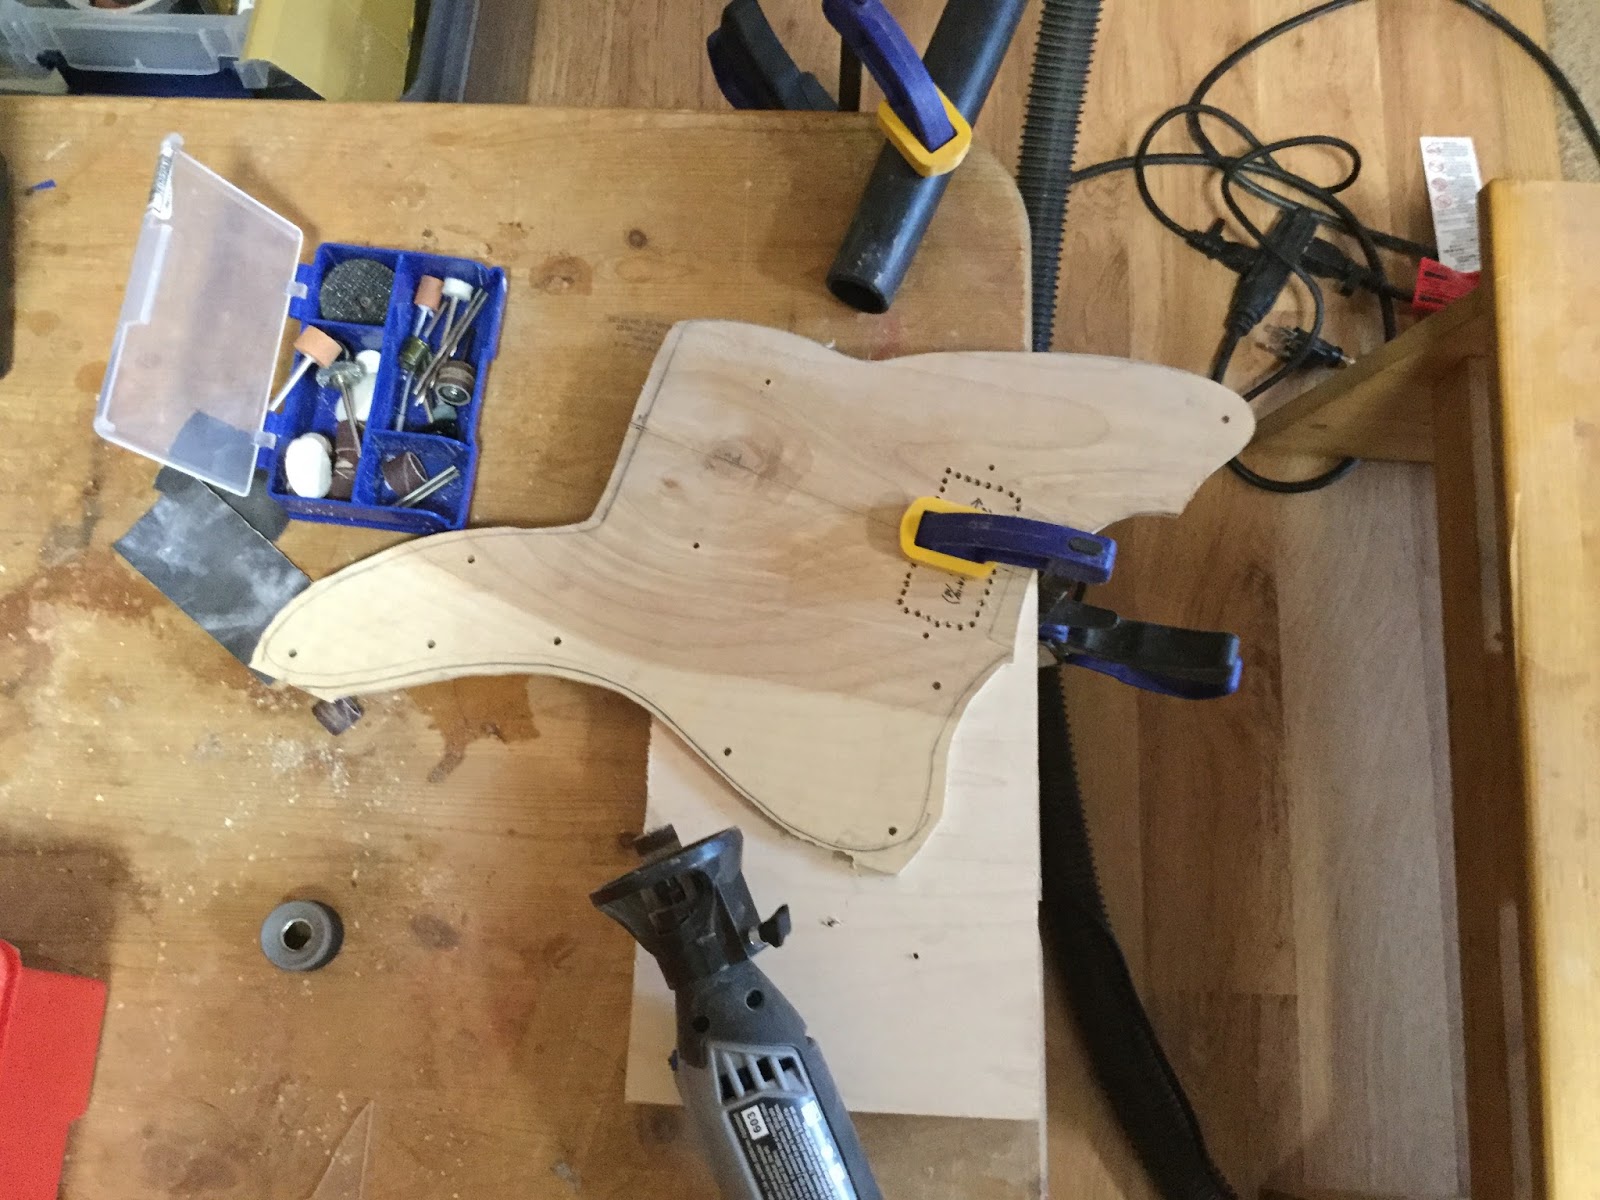
Next ... holes for the pickups . . . well I can cut them freehand but we all know how that will end up with my hands so . . . first a jig, need a 1.5+7/8+7/8 by 2.75+7/8+7/8 = 1 4/8+14/8 by 2 3/8+14/8 = 3.25 x 4.25 . . . I think (it's from memory so go look up the dimensions before you use these . . . they MAY be wrong - the 7/8 is the distance from the sanding drum to the edge of the dremel cutting guide). The first pic are the first glue joints . . . just butt ends on pieces cut exactly to size . . . measure . . . measure . . . measure . . . cut and measure and sand and measure, well you get it by now I'm sure . . . . The 2nd photo is the final glue joint with pieces of hawthorn profile (I had a short waste piece hanging around) going over the butt joints to reinforce . . . . .  clean off the excess glue . . . lightly sand . . . wouldn't want to change those carefully set dimensions.


So cutting the actual holes is next . . . . 


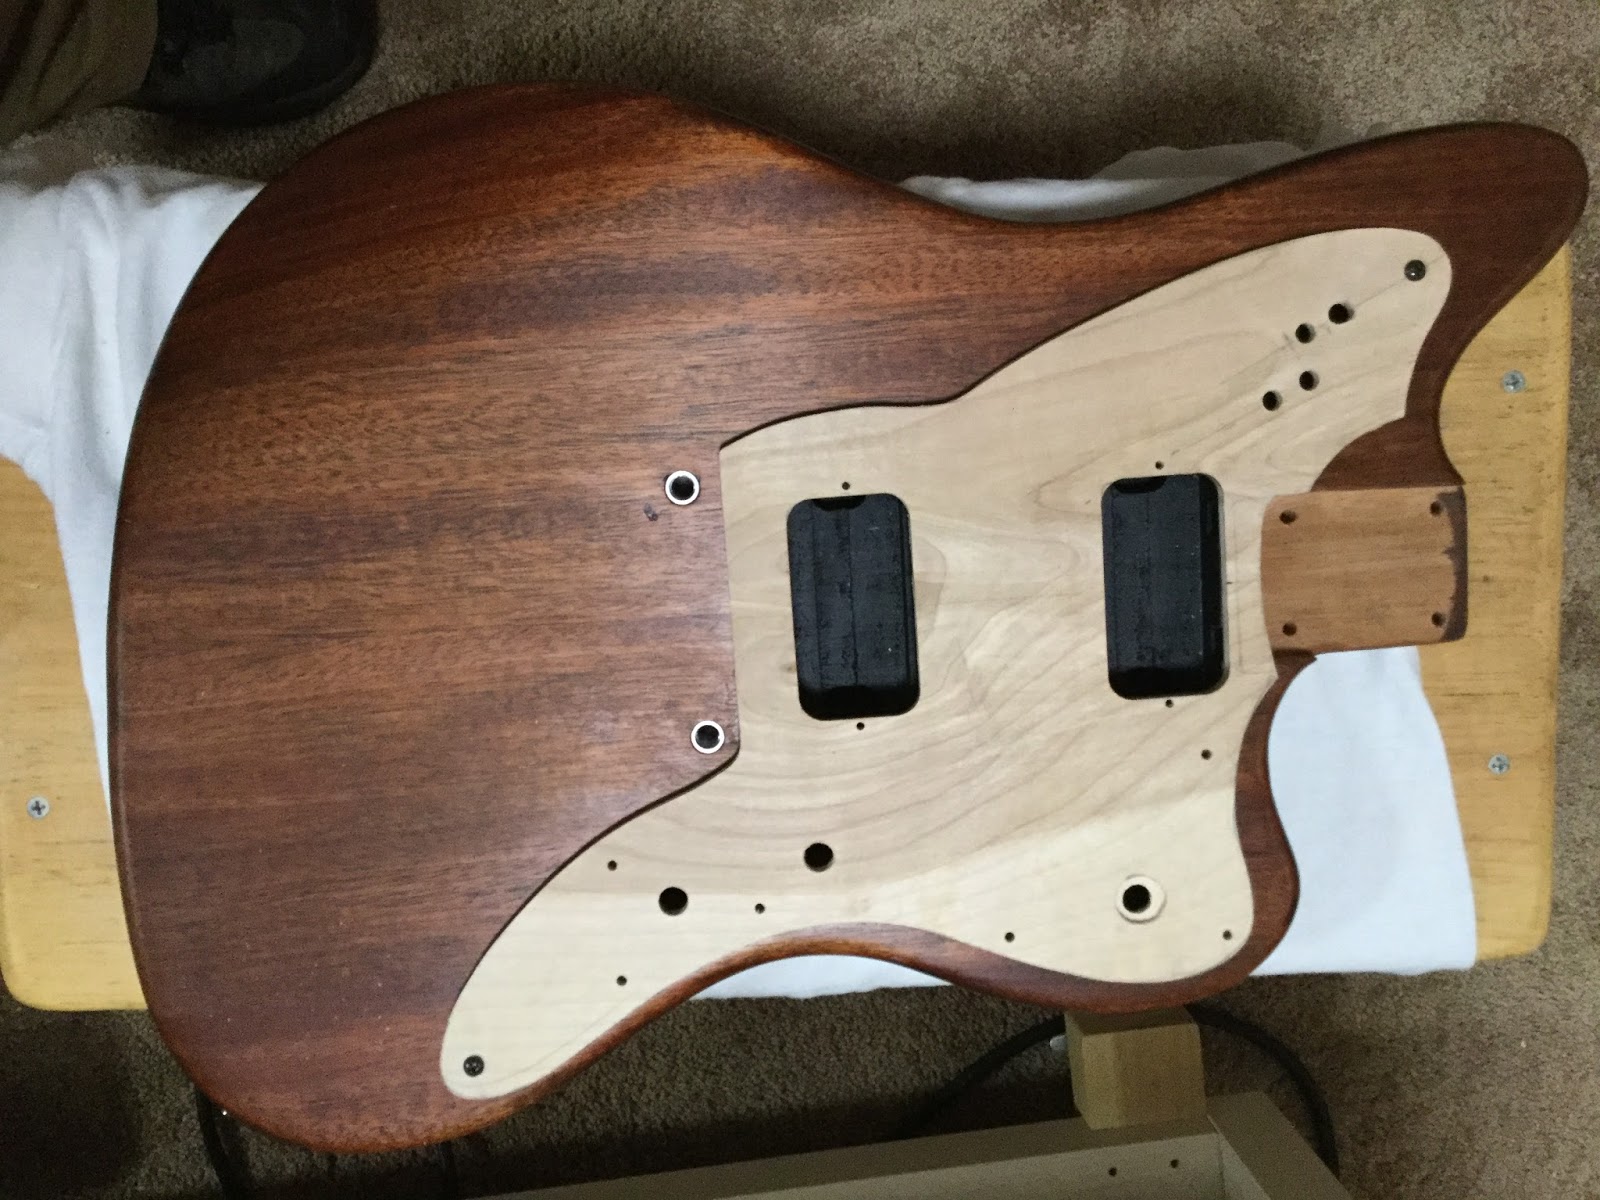
Roughed out holes on the left AND . . . . . . . the finished product one the right . . . . what did I say about measuring, I went with the cross through the center of the pickup . . . and didn't check against the holes for the pickup screws which had been drilled previously . . . . . . . one OR the other was NOT exactly where it should have been as I'm dead on neck to butt but off by 0.75 mm left to right . . . . . . ALL together now . . . . . . MEASURE . . . . . 


So holes for controls next . . . . 

And here are the ones for the selection of the coils in the pickups . . . . the eagle eyed once again can spot the mistake . . . yes the top left hole does look 'weird' . . . the original was off by 1/16 (or a bit less) but as the switches 'kiss' each other that's enough for some rather nasty words . . . MEASURE . . . although this time I did and still got it wrong . . . . that's why I make JIGS and then test the JIGS . . . 


So here are the holes for the volume and tone controls drilled and . . . that's the rotary switch installed . . . turns out there is an added problem with that one . . . more than one actually .. .. .. it's (probably) metic so a 3/8 hole is just a might bit to large - use a 5/16 next time - and the shaft on the piece is NOT long enough to fit through the 1/4 ply thus:


My first attempt at recessing with the dremel and a rotary bit set to about 1/2 the thickness of the ply . . . drew around the washer and cut freehand . . . not perfect but a credible attempt I think and any imperfections are covered by the knob . . . . . . 

So that was Sunday at 6 PM when I called it quits . . . more next week . . . 3 more switches to locate and a whole lot of soldering . . . .

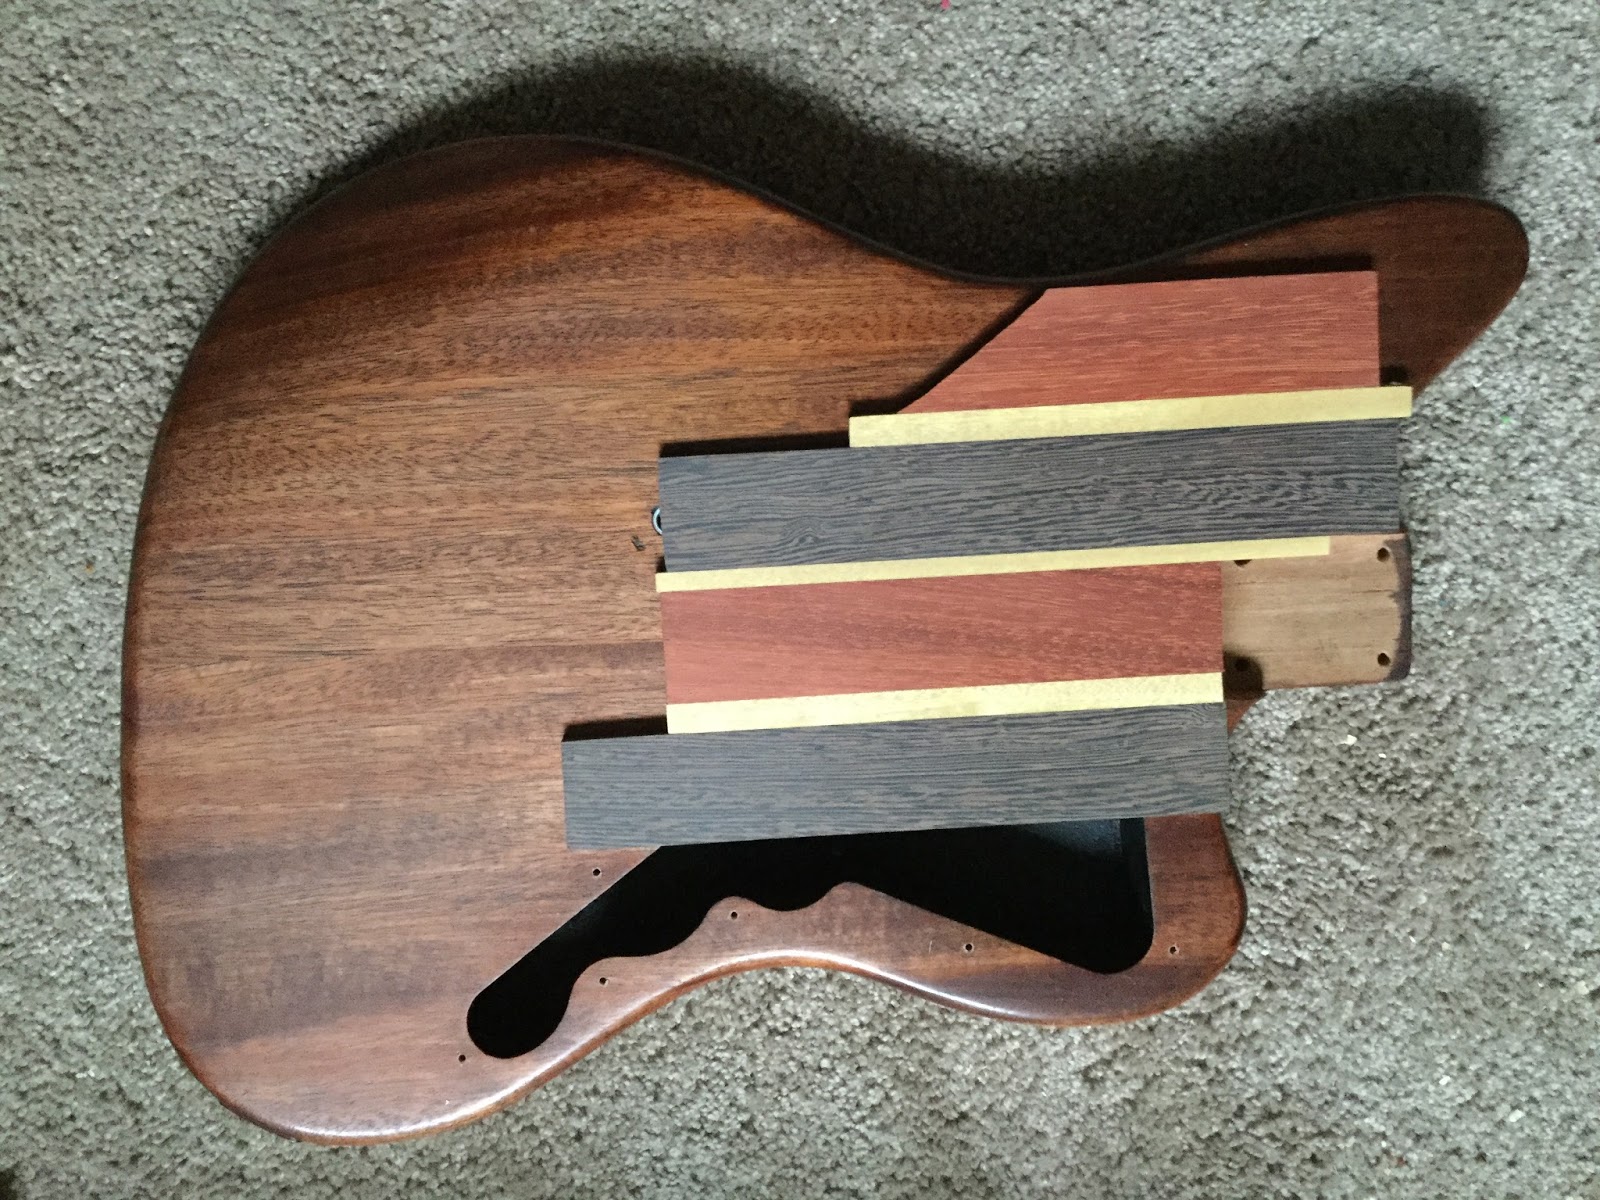
Oh and for the bottom below the wood part of the guard . . . maybe some of this


Hmm maybe a bit too wild . . . . . . 


Monday, October 24, 2016

They are playing my song . . . well sort of anyway . . .

Ok so first a rectification, #6 screws need 9/16 holes (not 7/16), the 7/16 are the holes for pickup screws to adjust the height . . . my brain is not what it . . . uhm . . . it probably never was actually and my memory ... well ... ... ... ... ... anyway.

As to my song, remind me ... ... uhm ... ...  to buy some ear protection BEFORE I use the Dremel on Optix ... or any other hard plastic - or plywood - or probably anything else ... ... ... my ears were still ringing . . . .

So this weekend yielded 2 new pieces of work . . . one was in plywood to check at least some of the procedures to make the eventual pick guard in wood. The problem is that I don't own a router. Not a problem for the outline of the guard, as long as the transitions are smooth a mm here and 1/32 there doesn't make a whole lot of difference . . . except when it come to where it fits the neck, defects there are - of course - quite obvious. So looking at the the spects for the Strat neck end . . . its rounded at a R = 5" with 0.25" transitions SO . . . . here's the jig . . .

5" from hole to cut . . . CHECK, the dremel circle guide does quite a nice job - hm don't see that one as a separate accessory, maybe you can only buy it in one of the kits . . . . here is a pick about half way through the cut

The main problem with this attachment though is that you can NOT see where you are actually cutting . . . thus the square acting as a stop ... turned out it was a little to far in . . . and the cut thus not quite as far as needed . . . .  


A bit off . . . I sanded in the 0.25" transition by wrapping a 1/4" drill bit with some sand paper . . . SO what went wrong


Ah . . . it actually helps if you look at where things are SUPPOSED to be . . . the bottom side is not straight AND needs some more wood removed . . . . 


Some judicious application of sandpaper ... et voilá ... not perfect but . . . . 


Looks good . . . . it's not perfect, there is NO transition at the bottom AT ALL, a JM pick guard has about 3/4 or more of the 1/4" transition intact before the guard goes off but it's hardly noticeable  AND this in NOT a JM pick guard . . . and that's where I left that . . . (you can see the start of the neck pickup opening and the holes for the bridge pickup screws).

The second piece I worked on, well . . . . . here is the glue up of the eventual TOP (or left) part of the pick guard . . . ain't ratchet clamps great:


and at last the final connection


The material below the pieces of Wenge, Yellow Heart and Red Heart is wax paper, it works REALLY well for normal wood glue . . . which doesn't stick to it . . . much. The tight bond III is a bit more of an issue but it's MUCH easier to remove some pieces of paper than . . . oh . . . the work table . . . or something else large and heavy . . . . . . . and if you are trying to replicate this piece (or something similar), remember to glue 2 pieces together COMPLETELY - i.e. wait at least the minimum time recommended on the bottle - BEFORE glueing a 3rd piece to it, 1 (one) seam at a time . . . more than one is asking for trouble. And make sure the wood is 'stable' before starting, these pieces had been living in my drawer for about a year before I used them. It's a bummer when you use wood fresh from the store and it 'bends' . . . I had that happen with an Oak cutting board I made (and yes I know, Oak is't the preferred wood for that anyway) . . . "problematic" is one way to put the result. Oh and one more tip, when gluing exotic woods, ESPECIALLY when the surface area is small, degreasing is a MUST. The Red Heart was particularly troublesome in that regard, it needed quite a LOT of "wiping", keep working it until no more 'color' ends up on your paper towel, any organic solvent will work - and please do it outside, in an open door or at the VERY LEAST open a window WIDE and WEAR NITRILE GLOVES - Hexane would be my preference but it is possibly hard to come by, Acetone may be the best, but don't breathe it more than you ABSOLUTELY have too. Mineral spirits (or Coleman fuel) will work OK . . . Stay away from Xylene and MEK unless you KNOW that you KNOW what you are doing and your brain cells will thank you . . . . 

Stick the piece down (a layer of painters tape on the piece and a layer on the work surface . . . some super glue and everything stays put nicely without anything to inhibit the sanding) . . . use a LARGE sanding block so everything ends up nice and flat . . . make sure you are comfortable, put on some music, you'll be there for a while . . . and go to town . . . 
So after about ~ 2 hours of sanding with 80 / 120 / 220 and 320 grit sandpaper (the back was only taken down to 120) we have .... 

THIS


It obviously isn't a pick guard yet but it's getting there . . . . . . . . when it's finished the Yellow Heart will probably be almost golden nicely offsetting the black/dark brown of the Wenge and red (we'll have to see how red it actually will end up being) of the Red Heart.

POSTSCRIPT . . . Ah so that's what it is, the red isn't Red Heart after all, it's Padauk . . . . . . . memory, or rather lack thereoff . . . . . . 

Monday, October 17, 2016

Guarding my sanity

Sooooooooo ................... I started this in March and . . . . . well progress has been . . . . light . . . .

First off, while the vacuum driven dremel 'worked' going was rough and it did a less than stellar job leaving a LOT of hand sanding ... so not ideal. The problem was identified later this summer when I got a motor driven one . . . the RPMs on the vacuum one are just to low for cutting the hard OPTIX plastic, it probably works fine of drywall (for which it was intended which is much softer and 'crumbly') but that was not how I was using it ..... ... .. .

 So here we are once again . . . a sheet of plastic and ......... so holes. This time I decided to put in the pickguard screw holes FIRST so as to positively and reproducibly fix the plastic to the body between doing the cutting so I could see what progress I would be making . . . note that the crew holes are NOT is the traditional jazz master positions, currently using 7/16 (I think) holes for #6 black pan head screws . . . in the final version they will be replaced by antiqued oval head bronze #6 but this works for now.


And here we go . . . this is after drawing out the rough and cutting with both the regular spiral cutters and ... this https://www.dremel.com/productimages/125lg.jpg which lets you etch a fine line across the top or cut all the way through . . . they do seem to wear out after a (longish) while hough. Both produce melted plastic so possibly I have to back off the RPMs some . . . . OH . . . and if you're just making a template or otherwise don't care about having an absolutely perfect surface, ESPECIALLY if you're just making a template, get rid of the protective plastic on both sides, it just gums things up, melts and generally seems to make a mess.


Most of the shaping was done with sanding drums with low grit, you can regulate how much is taken off how fast by changing the RPMs . . . lower RPMs are much less aggressive down to somewhere around 10K ... lower and things don't work very well . . . OH and stay below 20K, you CAN crank it up to 35K but it goes REALLY wild. Also there is a difference working clock wise and counter clockwise that influences things . . . . 

And then . . . things go wrong . . . I drilled the holes for the pickup screws (remember: measure check, check against the actual pickup, measure again . . . . stupidity and all that). Well I got THAT right (the holes for the crews that is) and then went off the rails, I wanted predrilled holes in the corners thinking that they's make nice round corners, so . . . . I drilled some 5/16 (I think) holes ... never EVER drill large holes directly in hard materials that can shatter or crack ... you'll rip something out. And that was when the stupid set in, apart from predrilling smaller holes . . . you should ALWAYS fix your work piece in place so it doesn't flop around when you forget to hold it with sufficient force . . . . nope I thought to drill the larger holes totally free . . . The first one went kinda OK ... and so did the second . . . the third was iffy and that should have been my warning to stop and do things RIGHT but I was in a hurry and . . . . well as you can see with a little looking drilling the fourth corner (top left) . . . well no need to elaborate, there is now a crack running from the left edge of the neck, to the hole and from there into the hole for the pickup screw and then down south . . . not real obvious in the photo below but . . . . . well it's a show stopper on this piece obviously . . . . . 

So this is where I pretty much left it last weekend. This weekend I got a new piece of plastic, drilled the holes for the pick guard screws using the old one as a template and fixed them together using some #6 nuts & bolts and then cut the outside (this is what you see above, the 2 pieces held together by 2 of the bolts).

As we are now back where i was about 2 hrs of work ago . . . . next holes for the pickups. I already had the holes for the pickup screws so they transferred and the outline for the neck pickup so that's were things started this time . . . . . and even with a DIRECT transfer . . . measure . . . please measure, just to make sure . . . . .

So below are the tools, well the drill is missing . . . first I drilled plenty of 3/16 holes along the inner edge (see left) so I wouldn't rip or crack anything as before . . . punched out the rough hole and then proceeded to shape it with the dremel . . . turns out the distance between the edge of this https://www.dremel.com/en_US/products/-/show-product/accessories/565-multipurpose-cutting-kit attachment and a sanding drum is 7/8", measure, measure, measure and then start sanding . . . see below for my setup . . . Oh and BTW small carpentry squares are HANDY . . . just make sure you don't mistake the 1/12 scale (if present) for the 1/16 and then use another measure to transfer that measurement . . . NASA once confused US and metric and lost a Mars lander . . . the consequences of confusing 1/12 and 1/16 when making a pick guard may not be AS disastrous but . . . . . .  


And here is the intermediate result                                                                                                             The top is fine but the corners around the bottom have to large a radius and the bottom edge is JUST a tad to close ... so more sanding both by hand for the corners and taking just a 1/32 of that bottom edge with the dremel . . . .  And below is the final . . . not absolutely perfect by measurements but I can't really see the difference by eye . . . . . . . 


So one pickup hole done . . . one to go . . . . 

I was some what sick of sanding by this time . . . . and have more in my future . . . . darn . . . so I moved on to laying out the switches using the cracked guard . . . it's got to be good for something . . . .


So here are the switches in the top cavity for the pickup selecting of the individual humbuckers (rail single, 'P90' single, series & parallel - there are 2 DPDT witches for each pickup) . . . plus for now the phase switch BUT I'm almost positive that this will move to the vicinity of the pickup selector in the final version . . . volume will go into the pocket below the bridge pickup, tone below that and I WAS thinking about doing the unconventional thing and putting the pickup selector (rotary) in the final pocket where the plugin is in a traditional JM (I have a side plugin here) BUT ...... well I have maybe 1/8" clearance so placement MUST be exact AND then I'm stuck with 3 switches (phase, tone cap selector & treble bypass selector) that don't really have a 'home' . . . . . alternatively the pickup selector will go into it's more traditional place in the lower bout with the phase switch and the other 2 end up in that final cavity . . . .  decisions, decisions, decisions . . . . . 

Thursday, October 6, 2016

Shematic

Well it has been a while and real life keeps interfering . . . the garage room has now mostly been renovated though (hangups for hanging hammock chairs were the biggest headache . . . BTW attics are HOT when the sun is out), the chicken run is done . . . although every once in a while one still escapes . . . and the whine rack, cookbook thing for a friend is done so I hope I have some time to finish this thing ... ... ... finally ...

So here is the prototype proposed schematic . . . the original had 2 tone pots but after a close examination it turned out that BOTH were set up as masters . . . and then there was the 4 way lever switch that did not quite work out . . . I'll have to revisit that one as it SHOULD be possible . . .

The pickup switches and phase switch will go into the upper cavity . . . the pots 'down below' and the rotary either in the lower front or maybe in the back as well . . . .

In the final version the double caps for the tone along with the switch may disappear and the duplicated treble bleed circuit almost certainly will . . . just want it in there for an A / B comparison for now . . . although, these are on/off/on switches . . . .  I may retain an on/off switch at least for both as well and/or a wide open switch bypassing both volume and tone pots altogether.

I'll cut some acrylic this weekend and fit the switches and start soldering . . . . . . good times . . . . .